Microsoft Planner's Custom Fields of Dreams
Custom fields in Microsoft Planner premium plans allow you to store business-specific information on tasks, control data entry, and filter and color-code plans for enhanced project management.


Welcome back! It's time for another useful, I must say, post on Microsoft Planner premium plans. As always, I appreciate you following my journey to learn a relatively new-and-improved tool from Microsoft. This week, I'll walk you through a very important feature: custom fields. But first, a tangent on Artificial Intelligence (AI) because without AI mentioned in a post or a product these days, no one will buy it 🤣.
AI gone wild!
I initially used Claude™ for some of my content and then, after a few posts, I decided to write on my own. I also used Claude and ChatGPT™ to come up with an initial set of topics by prompting them to tell me what the most challenging features in Planner have been for users.
Ironically, neither of those tools suggested Microsoft Copilot™ as a topic. I'll post about Copilot in Planner and Project Manager agent once I try them out but first I wanted to learn the basics of Planner. Any analysis requires good, clean data as one of my wise followers Branko reminded me this week! 🤗
Speaking of AI, if you want to kill some time, check out Claude's new Artifacts feature which is similar to Custom GPTs.
Lastly, I captured a funny experience that I had this week with Copilot in Microsoft Studio™ in an AI f-up post on Medium.
Bringing things back to Planner. If you aren't already registered, a good place for updates, issues, and help on Microsoft Planner is Microsoft's official Tech Community. They do a monthly "What's new in Microsoft Planner" which provides insights on recent changes, the most recent post is June 2025.
Onto the main topic, custom fields.
About custom fields
A custom field is similar to a column that you add in an Excel spreadsheet and allows you to store business-specific information on tasks in your plans. Just like Excel's Data validation feature, in Planner premium plans you can control the data entered by specifying what type it is.
There are five types of custom fields available at the time that this post was written:
- Text - free form text up to 4,000 characters long
- Date - it's a date!
- Number - a number with rollups, explained below
- Yes/No - binary
- Choice - a menu of up-to 25 choices that you define
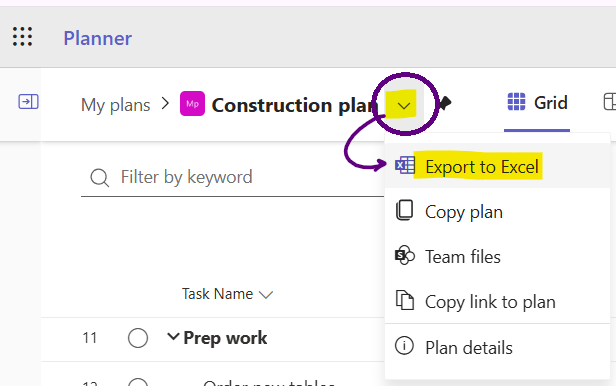
What's great is that these fields are included in the Export to Excel feature. Kudos Microsoft!
Where and how many of them?
Microsoft Planner premium plans – those requiring a Plan 1, 3 and above license - support the addition of custom fields. This feature is not available in basic plans. If you used Project Professional, then you might be familiar with this feature. Unlike Professional which supports up to 30 custom fields, Planner premium plans only support 10 custom fields.
Now that you know what they are and which Planner license supports them, let's add one.
Create a custom field
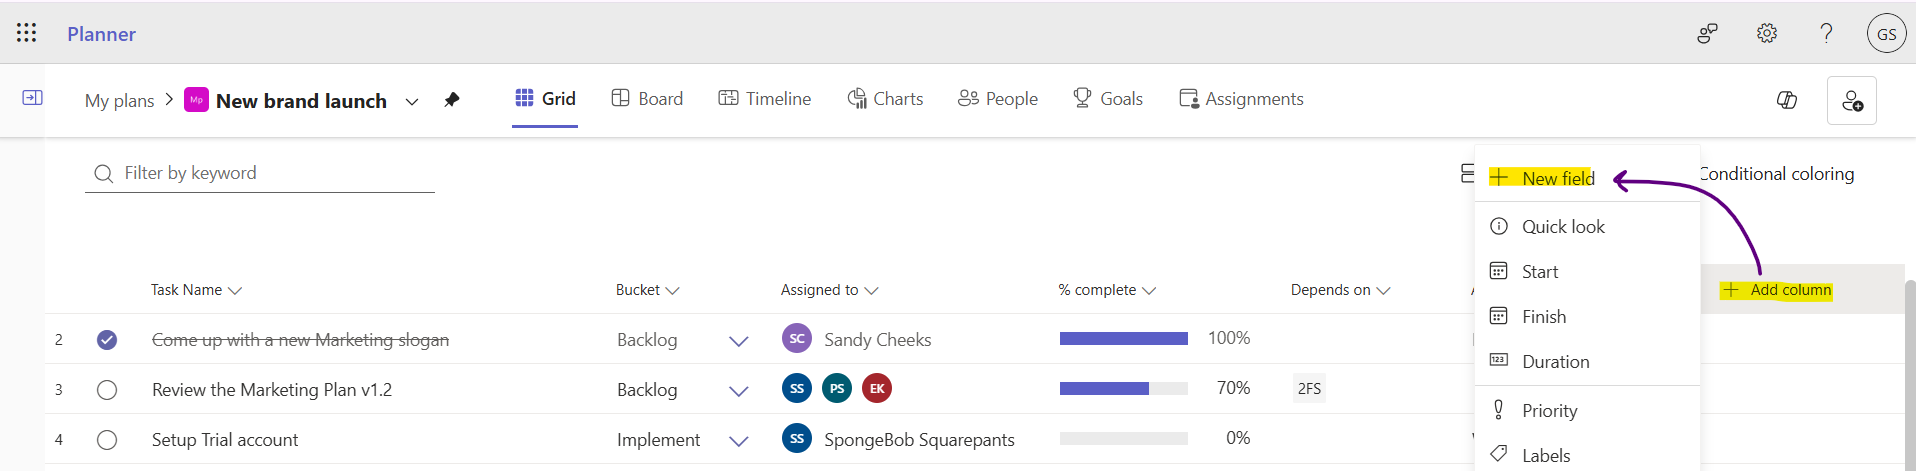
It's easy to add a custom field, in Grid view look to the far right on the table headers and click "+Add column" then "+ New field".
Once you choose "Add column", the following dialog is displayed where you specify the "Type" of data to be entered and give it a "Field name".
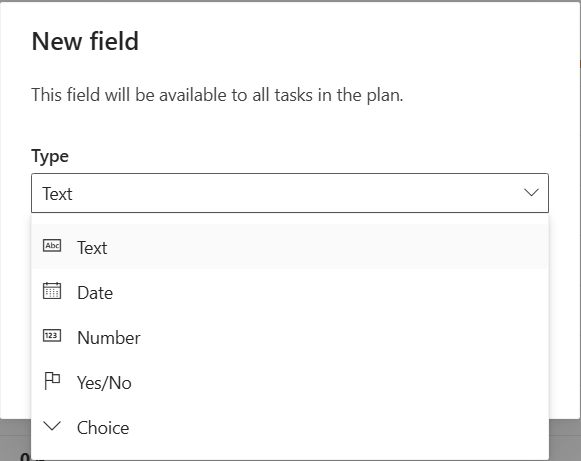
After you specified those two things, click "Create" and the new field is added as a column just to the left of "+ Add column". That's not the only place you can find the field, so let me tell you the other places.
It's all in the details
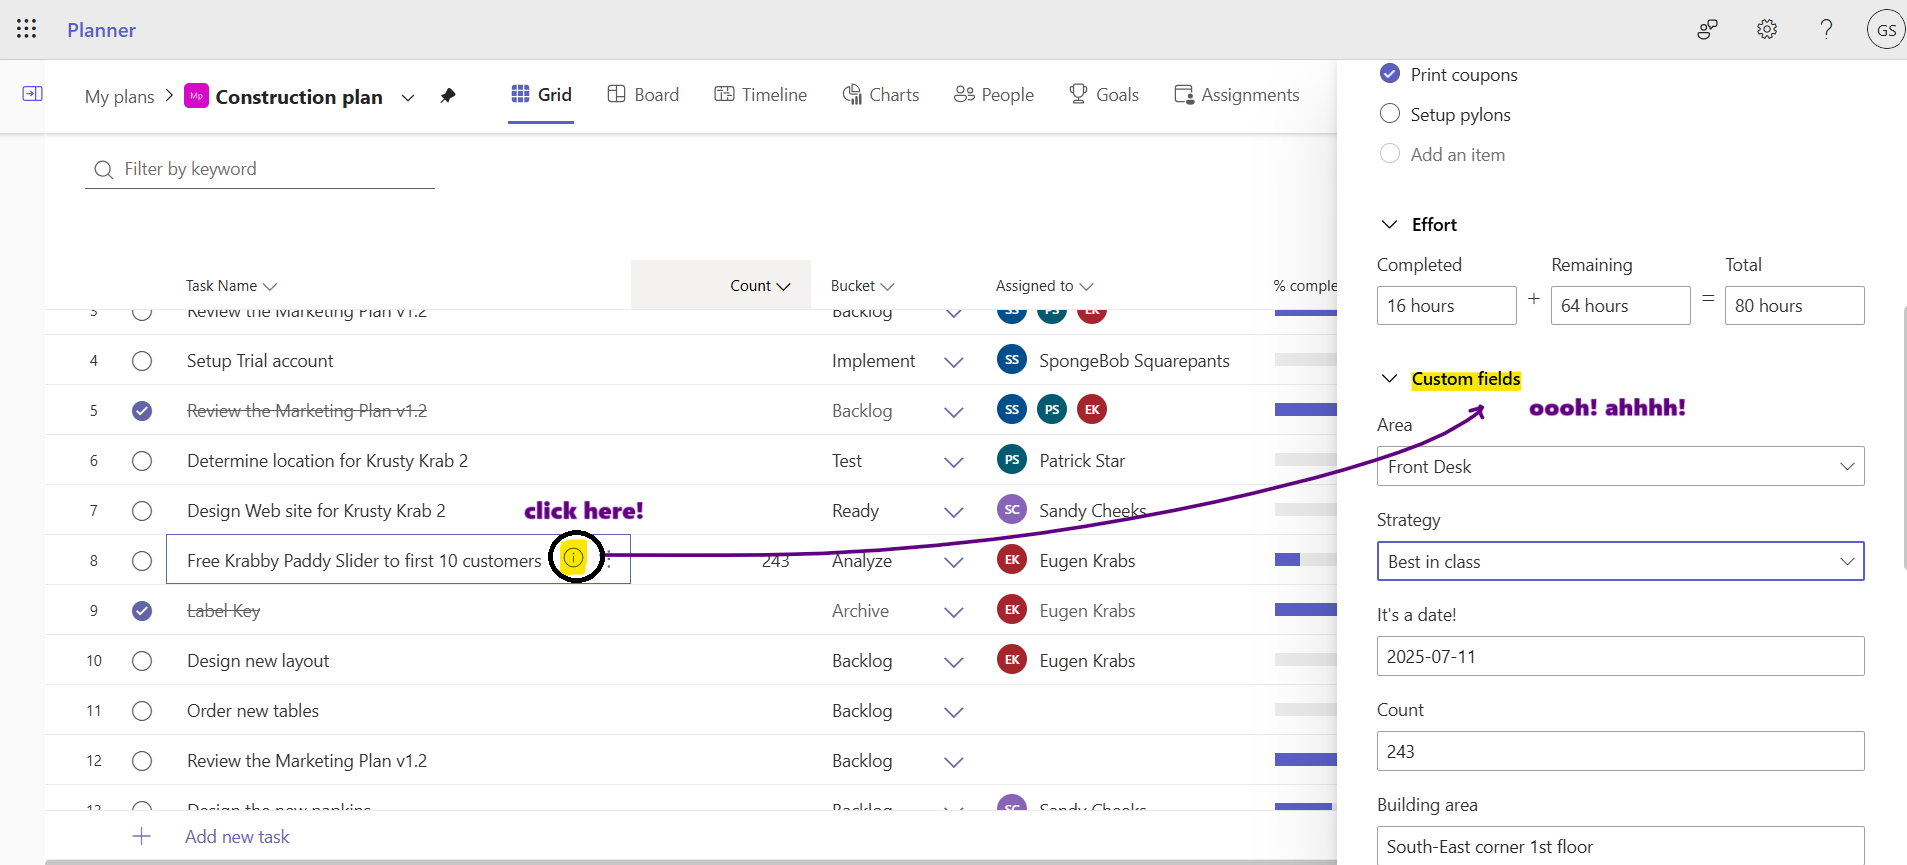
When you open a specific task in the Grid or Board views, you get a form with the task details. If you scroll down, you'll see each of the custom fields where you can change the values of the field for a specific task. The user experience is very well done!
Here's how you change the custom field values in the Grid, Timeline, or People views. Hover over the "Task Name" and click the "i" button.
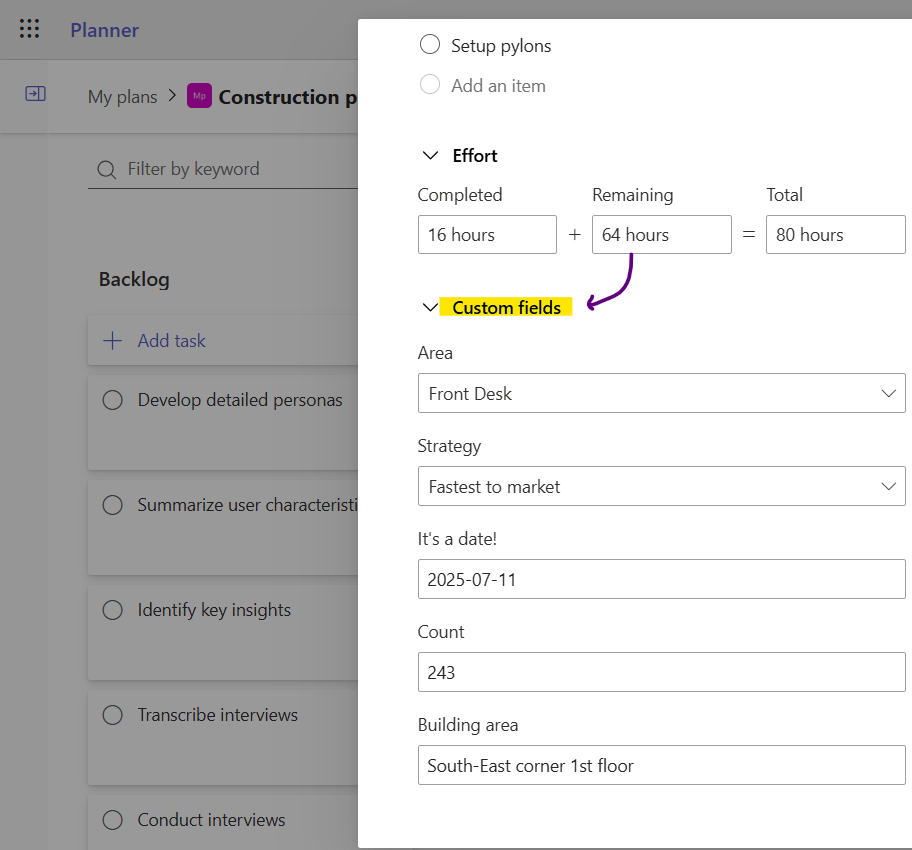
If you're in either the Board or People views, click the task's card and a dialog is displayed with the task details. Scroll down to see your "Custom fields".
Filtering by custom fields
Microsoft has done a great job integrating custom fields right into the user interface so that your fields appear as first-class citizens across the app.
In any view, click the "Filters" button and scroll down to see the filters for each custom field, except the custom Text and Number type fields.
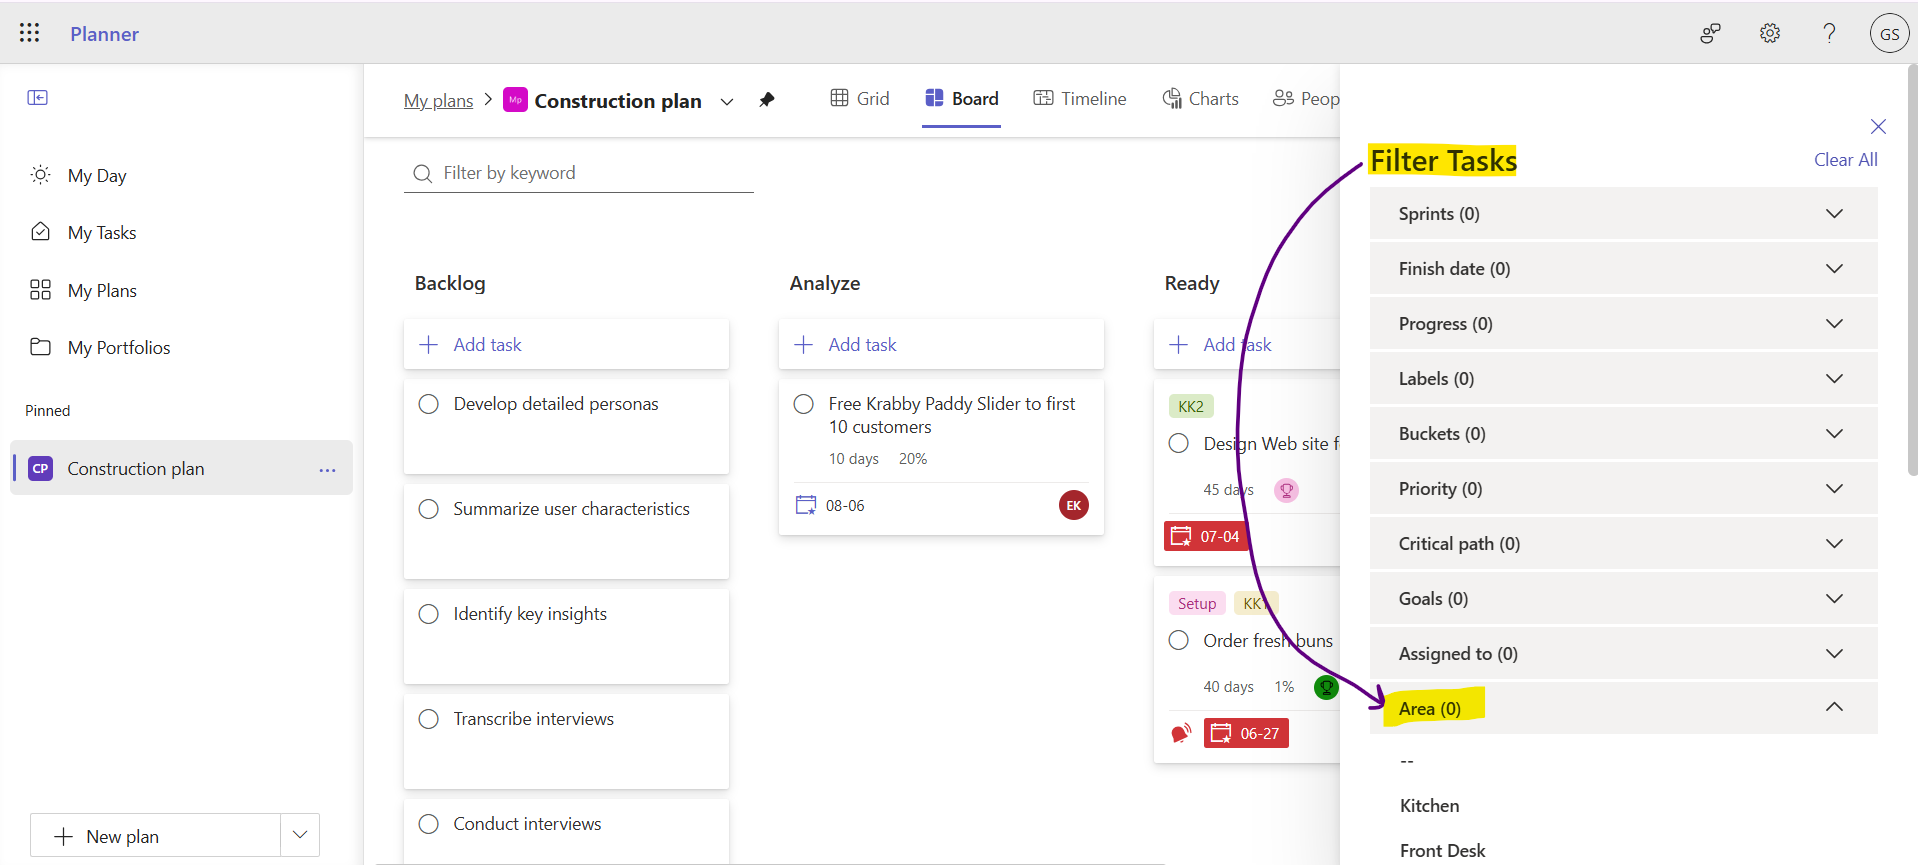
At first, I thought that we can only filter on Yes/No, Date, and Choice fields and not Text fields but I was wrong!
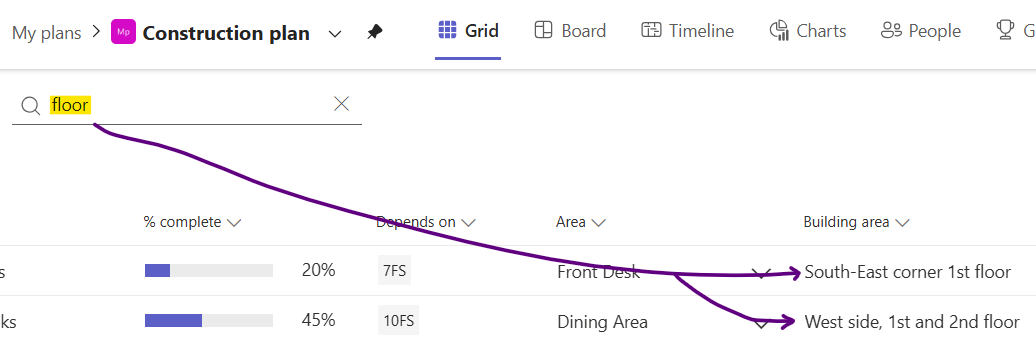
Microsoft did a smart thing and when you search with the "Filter by keyword" field just underneath your Plan's name, Planner searches the custom Text fields too! 🥰
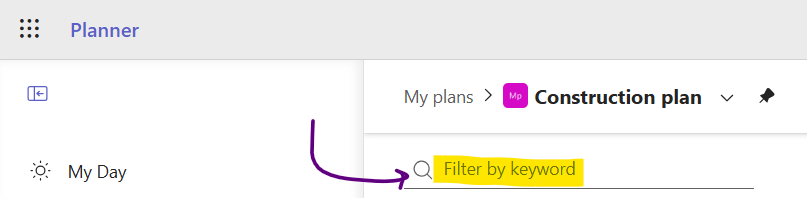
Here's an example of my search for "floor" and the result showing two tasks containing that word in my custom field "Building area":
So far you know how to add a custom field, how to change its values inline or inside the Task details dialog/pane, and how to filter tasks based them. Now, I'll describe a few more things that you can do with custom fields and then some limits and limitations.
Colouring
Who doesn't like colouring things? (notice the proper spelling this week 😂).
With the Conditional Color feature in Microsoft Planner that I covered last week, you can even have the data color-coded in your plan. How sweet is that?!
Start in Grid view and do the following:
- Click "
Conditional coloring" - Choose the custom field you want to colour
- Choose an "
Operator", in this example "is more than" - Type a value e.g.
3 - Choose a colour
- Click "
Save"
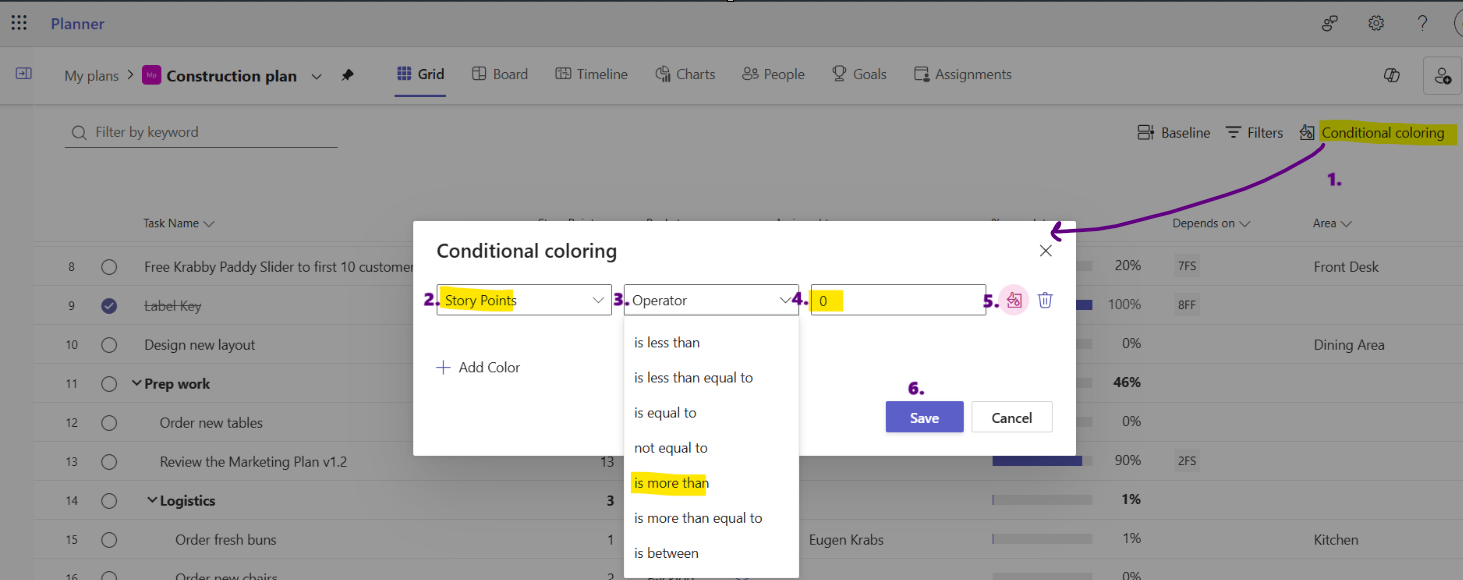
And, voila, the tasks with Story Points more than 3 are highlighted in pink:

This next piece of functionality is handy.
Rollups
This part of the custom field feature is so sweet that it deserves a nice image:

Silly me. Rollups allow you to summarize data in a column for one high-level task from it's sub-tasks.
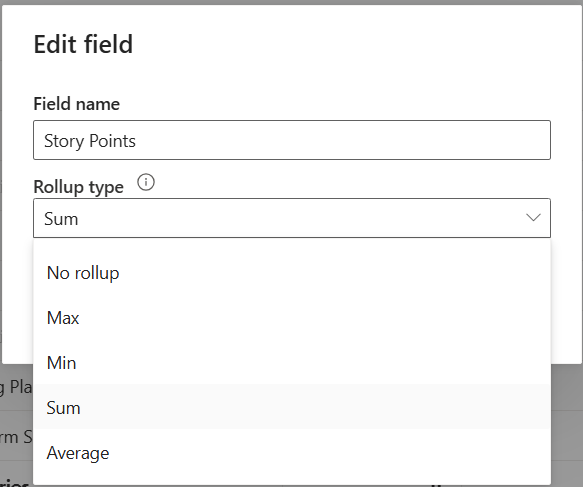
If you have a number field, you can edit it here:
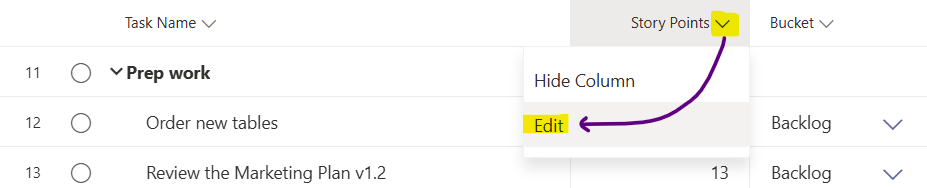
This dialog is displayed where you can choose a "Rollup type"
Magically, the values in subtasks are added up and displayed in the top-level task. It even works with subtasks that have subtasks as shown here under "Logistics"

Hiding and deleting
Like other fields in Planner, you can hide or show custom fields in the Grid view but a word of warning:
So, do a export of your plan to Excel before you delete any fields.
Limits and limitations
Every tool has its limits and this section describes the limits for the custom field feature in Planner premium plans.
As mentioned at the top of this post, you can add up to ten (10) custom fields. That's a good quantity but, like labels, use them wisely and keep a few spare ones if your project is a long running one.
A Number field can have a value from -100,000,000,000 to 100,000,000,000 (one hundred billion). In scientific notation, that's 1 × 10¹¹ . You could also say 100 thousand million, 1 followed by 11 zeros, and many other ways. Basically, a pretty big number.
The Number field rounds up to two decimal points in the user interface, but you can actually enter up to 14 decimal points in a Number field. I checked by entering 1.012345678901234567890 in Planner, exporting the plan to Excel, and here's what I got:

You can't change the type of a field once it's created.
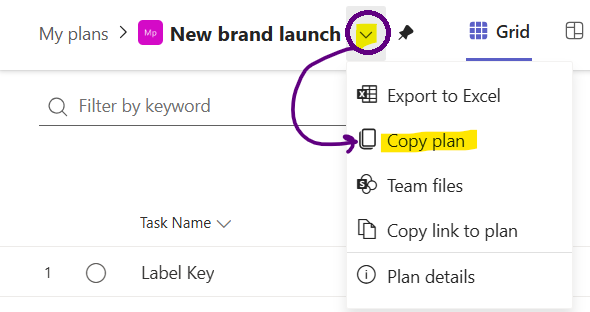
Custom fields are unique per plan so if you want the same field in each of your plans, you'll need to create a plan with the custom fields and then use the "Copy Plan" feature found here:
No soup for you when it comes to API access, custom fields are not accessible via Microsoft's Graph APIs. For Citizen Developers or "real" Software Developers that means the data cannot be read or updated from Power nApps – my cheeky term for Power Apps – or bespoke software respectively. I expect and hope this will be added.
You really read this far? It's time to wind this post down.
Wrap it up!
Custom fields are a great feature of Microsoft Planner premium plans and you'll find them very useful. You may not have a need for them today, but it's good for you to be aware of their existence. Me? Well, I've used custom fields on every plan that I've created so far.
With this feature you can define data that is unique to your project, set values on a per-task basis, filter by them, and then colour your plan to your heart's content. You can even export your data to Excel. Overall, the usability of the custom field feature is very well done. My guess is that people will use this in ways even Microsoft did not think of.
Thanks again for subscribing and please "like" or repost my promotions of these posts on BlueSky (otto-ms.bsky.social) or Reddit (r/plannerpremium) and/or forward this post to a friend, a colleague, a long lost cousin, anyone who could benefit.
Until next time, have a great Plann
in
g
week ahead!
Otto.